Working with KanDo
Setting up a project or cycle
How long should a project or cycle be?
Typically a project’s duration is based on the estimated length it will take to complete.
Using this duration in your project management tool of choice can make it much harder to keep track of and understand how well your processes work. It is better to create regular process reviews throughout your project and use these as renewal points.
This review cadence is what should determine the length of a project or cycle.
Whether you practice a form of continuous improvement or not, projects that require an agile approach are prone to change.
If such changes affect occur mid project they break the consistency of your data over time. This makes interpreting historical data more difficult if not impossible.
KanDo project and cycle renewal feature lets you quickly setup a new project or cycle you can apply the required changes to without compromising the accuracy of your data or its historical interpretation.
Setting up a cycle
From the start page click the add project button to display the controls and select the month cycle period, specify the year and month that suits you and leave count as 1 as in the image below. Then click the add button
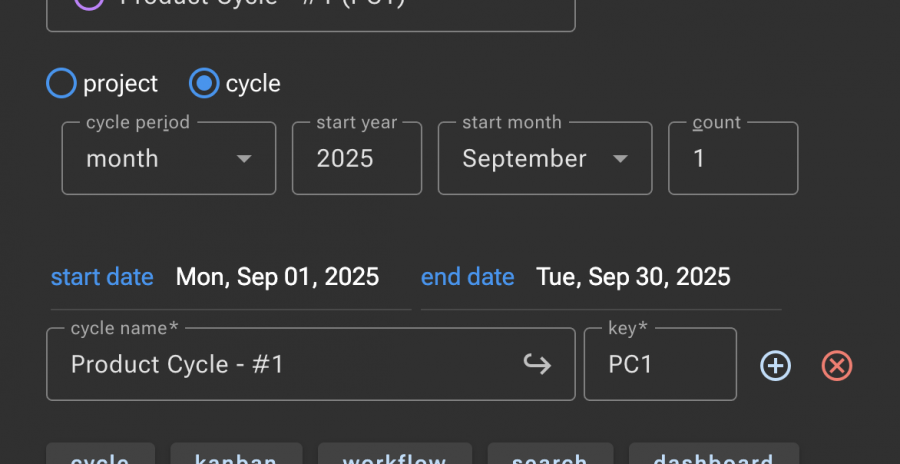
This will result in the following configuration for the cycle:
- Hide work item types Initiative and Epic
- Adds a tag under resolutions
- Deselects the default templates for the Product and Sprint backlog work items so they will be created with a blank description.
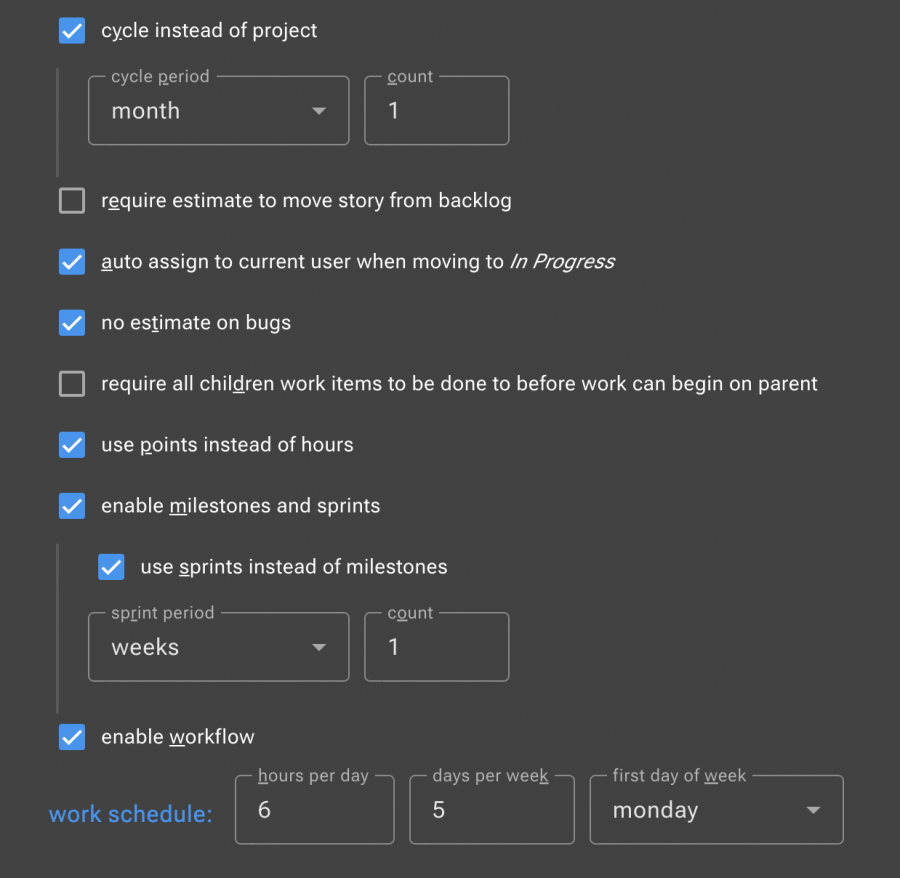
The short video below runs through the process above then makes some changes to the cycle configuration to:
Creating backlogs
Whether you are using cycles with sprints, projects with milestones, cycles or projects without milestones or sprints, it is very practical to setup an area for building the project plan. In Agile this the Backlog. In Scrum there are two types: a product backlog and a sprint backlog.
Think of the product backlog as building a roadmap, you put in the pieces you want to put in your product, refine each piece and decide on the order in which you think they should be implemented.
The sprint or milestone backlog represents the work you intend to complete in that sprint or for that milestone. You build this backlog as you refine and breakdown your plan into small pieces that can be completed within the given period, ordered in the desired priority.
Creating a product backlog
In KanDo, you define a Backlog as a container work item. A container work item does not take part in the KanDo workflows or show up on the boards. They are there to manage groups of work items and let you apply a small number of propeerties to all child work items.
The following video goes through the steps of building a product backlog:
Create a sprint or milestone backlog
As you refine your product backlog you can start creating sprint (or milestone) backlogs to prepare for implementation. The following video goes through the step of setting some properties on the work items and then moving them to sprint backlogs and changing their status to todo.
The elements of a work item
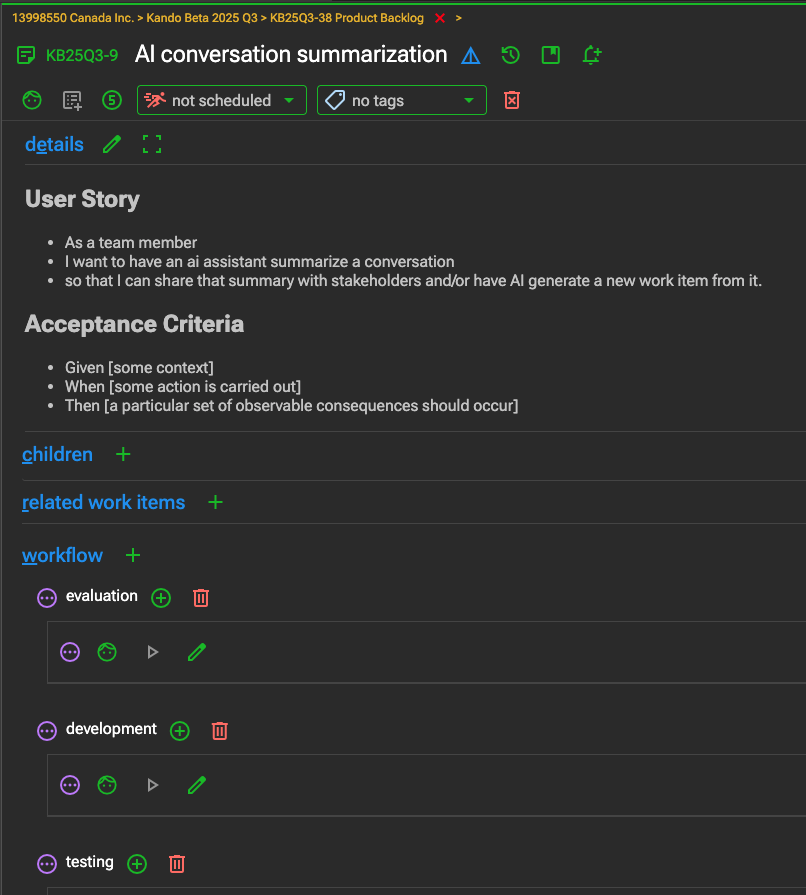
Breadcrumbs


At the top of the work item breadcrums indicate what organization, project, and parent work item, if any, it is part of.
Clicking on ‘set parent’ allows specifying a parent work item. If one exists, the x button allows removing the parent relationship.
Title row


The first icon represents the work item type icon.
Clicking on it allows changing the type of the work.

The type icon is followed by the work item key and title.

The next 2 icons indicate what is being displayed: the item details or its history.

The following icon brings up a documentation page for the work item .

Clicking this icon turns on change notification for this item.

Click to display the discussion.
Status / action row
After the title, a status / action row of icons, buttons and selectors are there to inform you of the current owner, the current progress status, the estimate, the time spent, the sprint or milestone, the tags, followers, bug severity, origin of the bug report, environment the bug was found in, …
Whether one of these appears or is actionable will be dependent on the project configuration, the current state of the work item, user permissions, and whether it is a standard work item type, a bug, or a container.
For container types, this row lets you set certain properties to the selected children of the container.


Status icons


This icon indicates that the work item is not scheduled to be worked on. It is disabled if sprints or milestones are used but the item is not in one. When clicking this icon, the bstatus changes to ‘todo’ (i.e., pending).

This icon indicates the work item is pending (i.e., in todo). Clicking this icon offers a selection of available status changes.

This one indicates the work item is in progress. Clicking this icon offers a selection of available status changes.

This icon is displayed when the work item is completed.
Details
The details section is where you record the implementation details and success criteria.
The details viewer / editor can be expanded to cover the app’s main window. The editor supports Markdown and Mermaid diagrams.
When the details editor is empty a template selector appears. This lets you select custom templates to insert.
Children
In this section you can create new work items that are children of the one you from which created them. This is a shortcut from first creating an item and then setting its parent.
Related items
Here you can establish a relationship to other work items. For each related work item you can specify what kind rlationship they have with each other:
- Blocks / Blocked by
- Duplicate of / Duplicated by
- Follow-up to / Followed-up by
- Related
Workflow
If workflow is enabled in the project, this section lists each step and offers controls to start, stop, indicate the time spent and add comments or details. The best comments to add are any problems encountered while working on this step of the process as they can be used in sprint / process reviews.
Starting work with sprints or milestones
If you have created a backlog that contains the work you plan to accomplish in the coming sprint or milestone, you can take advantage of the container work item’s ability to apply certain properties to selected children.
If you have not done see Create a sprint or milestone backlog above.